This might put me in a whole different category of granola, but once you
try it, it will be hard to go back to buying yogurt in those little
cartons (plus, I don't know about in your house, but those always
disappear way too quickly around here). Not to mention all the added
dyes and sugars that are not needed in yogurt.
First off, I use a recipe that uses all powdered milk and water and no fresh milk. That is mostly because I have a lot of powdered milk already and we go through fresh milk pretty quickly. The nice thing about using powdered milk is that I don't have to heat it up and then let it cool down, I can just get it to the second temperature and I'm all set. I'm sure if you want to use fresh milk, you certainly can and it will turn out great. Secondly, I have a yogurt maker that holds two quarts. You do not need one of these at all... you can use a crock pot even (for directions on using your crock pot, go
here).
To start, you will need:
2 1/4 cups powdered milk
2 quarts water (between 108 and 112 degrees. I use my tap water as hot as it will get.)
Add the powdered milk and about half the water to your blender and blend until smooth. Pour into a large pitcher and add the rest of the water to get the last of the powered milk out. Pour into the pitcher with the rest of the milk. Using a candy thermometer, make sure the milk is between 108 and 112 degrees. If it is too hot, let sit and cool for a few minutes.
Before we move on, I want to talk about what kind of yogurt you want to use as your culture. You want to make sure it is plain, unflavored and has active cultures in it. I used Chobani this time, but I have used Dannon before with success. You should be able to look on the back of the container and see where it lists the live cultures.
Put 2 cups of the milk into a bowl and add 1/2 cup yogurt and mix well with a whisk. Mix the tempered yogurt mixture
into the rest of the milk. Pour into the yogurt maker, plug in, and let
sit until set; about 6-8 hours. The longer you let it stay in the
yogurt maker, the more sour it will taste. I like to check mine at about
5 1/2 hours and check to see how it's doing.
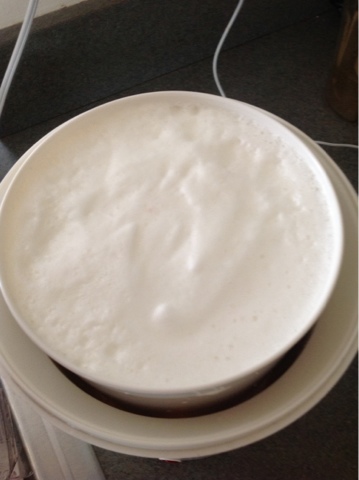
This is just after putting it in the yogurt maker. It is foamy from the blender.
This was after about 6 hours. You can see that the whey (the yellow liquid) has separated from the yogurt part.
If you stick a spoon in it, you can see that it is solid yogurt and whey. (Photobomb, thanks to Miles.)
Another look at what it should look like.
Now, you want to let it chill in the fridge for at least 8 hours. Warm yogurt is not like warm bread... it does not taste very good.
After it has chilled in the fridge, you can eat it how it is, or drain some of the excess whey off. This is how I make my yogurt Greek style. I put a wire mesh colander over a bowl with a coffee filter (you could use a double layer of cheese cloth or a tea towel here if you want) and spoon the yogurt into the coffee filter.
I let it drain for about a half hour. It will get nice and thick. You can use the whey in many ways, but I usually add it to smoothies or water my plants with it.
You can see what it looks like after about a half hour of draining... it doesn't have much liquid left and it will just sort of peel off of the coffee filter.
Now comes the flavoring! Get as creative as you want here. I have an abundance of home made jam, so that is usually what I use in my yogurt. You can also use honey and vanilla extract. This picture shows my breakfast this morning... I used caramel apple jam and it was SO good!
Now, here is what I do for my kids, so it is already flavored and measured out. I have these screw top containers that are about a cup and I put jam in bottom and scoop the yogurt on top. Then they can just grab it out of the fridge, stir it up, and eat it. So easy! This one shows the caramel apple jam.
The other flavor I did today was blueberry lemon. It turned out good, too!
Hyrum picked the lemon blueberry... he said it was good!
Miles had the caramel apple and Graham had the lemon blueberry. The fact that they are busy eating it shows how much they like it.
Maddy had a caramel apple yogurt. She didn't even notice me taking her picture.
So, there you have it! Pretty easy, huh? If you have any questions, let me know and I will do my best to answer them for you.
Here is the recipe all together for you.
Homemade Yogurt
2 1/4 cups powdered milk
2 quarts water
Mix the powdered milk and about half the water in your blender
until smooth. Pour into a large pitcher and add the rest of the water to
your blender to get the rest of the powdered milk out. Pour into the pitcher with the rest of the milk. Using a candy thermometer make sure the milk is between 108-112 degrees.
Mix ½ cup plain yogurt with 2 cups of the warmed
milk. Mix the tempered yogurt mixture into the rest of the milk. Pour
into yogurt maker and plug in and let sit until set; about 6-8 hours.
Put in fridge for at least 8 hours to cool. Enjoy!


0 comments:
Post a Comment